If you are a programer, Sikuli Slides can help you write code! Sikuli Slides is able to take a pptx and generate code you can include in your You can customize the code to meet your specific needs.
* You wish to implement some non-linear logic difficult to express as a sequence of slides. You can quickly put together a set slides, generate code from these slides, and add your own logic such as function calls or conditional statements on top of them.
* You have a set of slides that haven been running very smoothly. Now is the time to compile them into a program for better efficiency.
To generate code, run the Sikuli Slides program using the generate command word. Provide a pptx file as input, like below.
$ java -jar sikuli-slides-1.5.0.jar generate login.pptxBy default, a new Java class named GeneratedSikuliAPIProgram is generated. Its source file is saved in the working directory. Using the -name tag, you can specify another file location to save the generated source file.
$ java -jar sikuli-slides-1.5.0.jar generate login.pptx -name MyLoginProcessSikuli Slides supports the following target languages: Java, JRuby, and JPython.
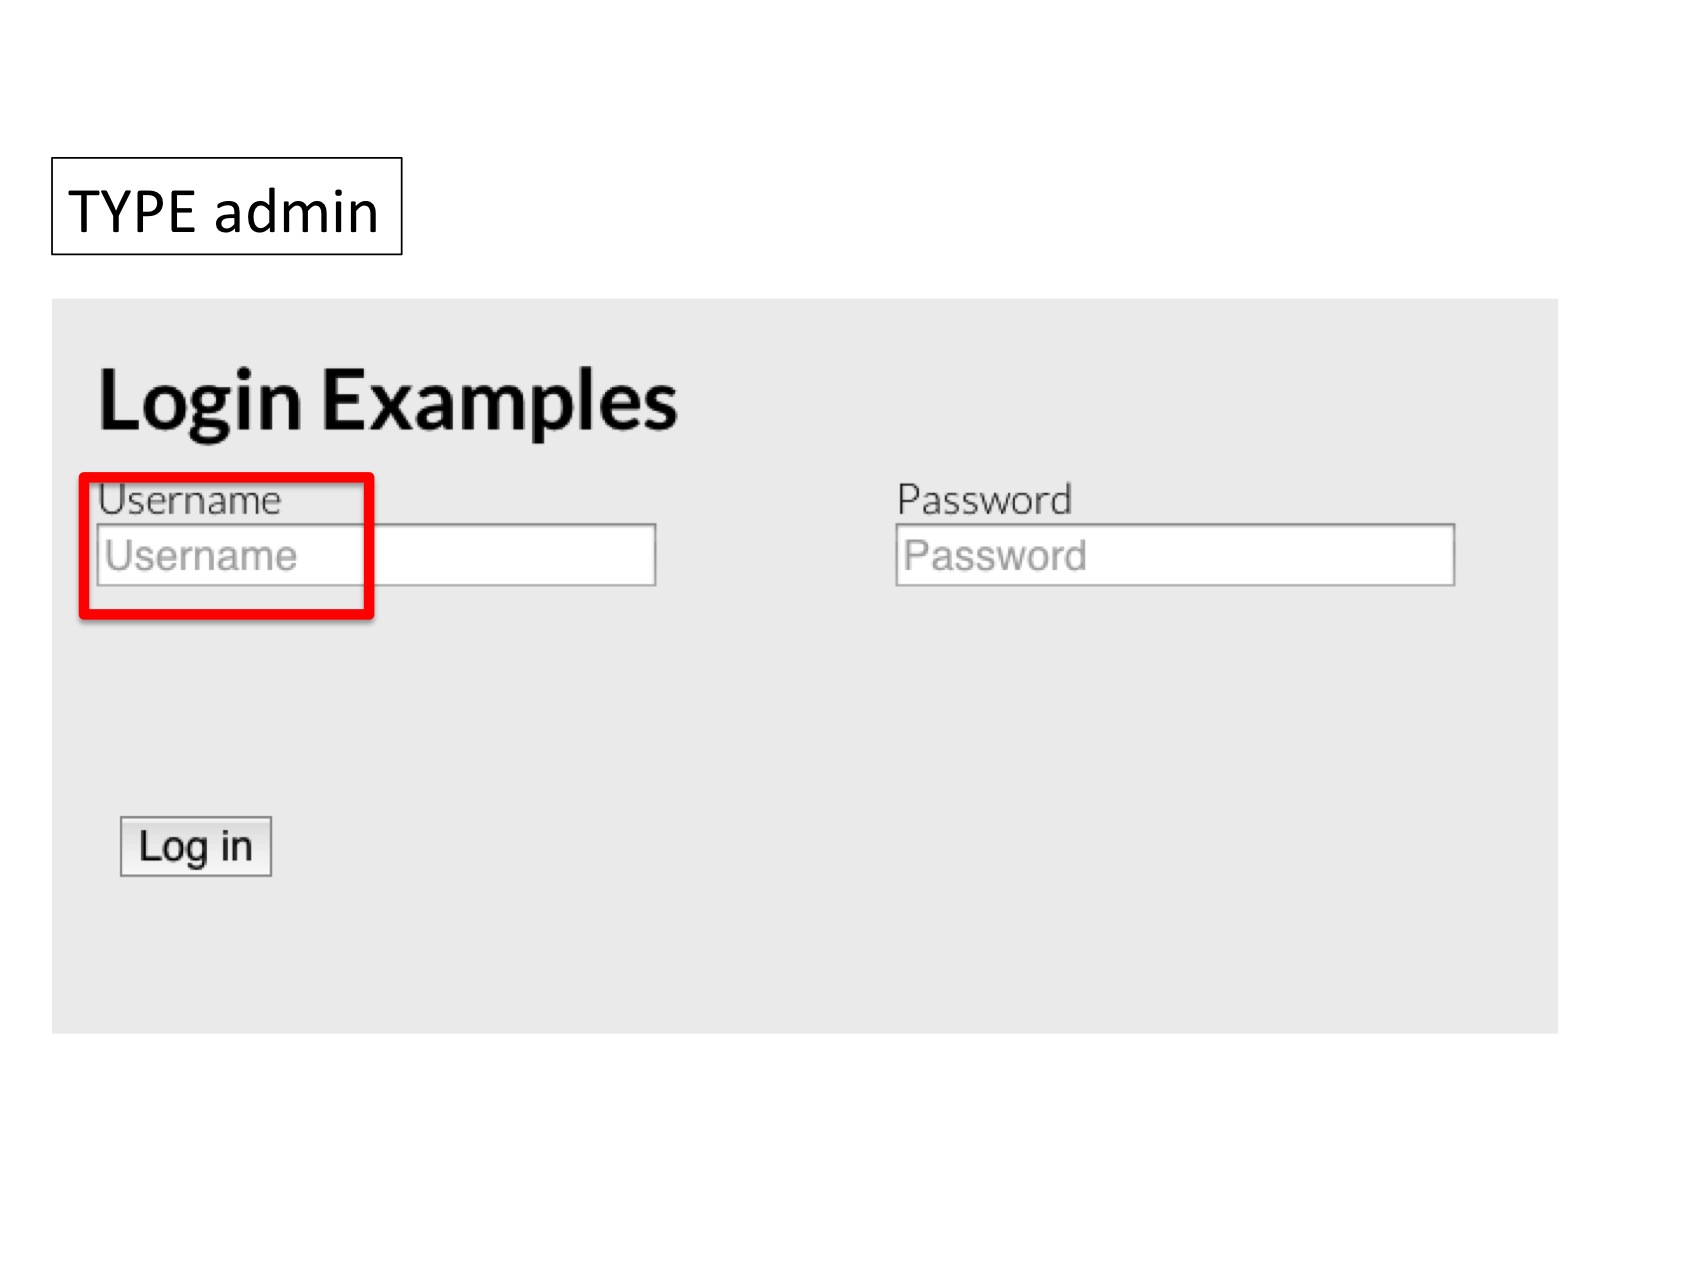
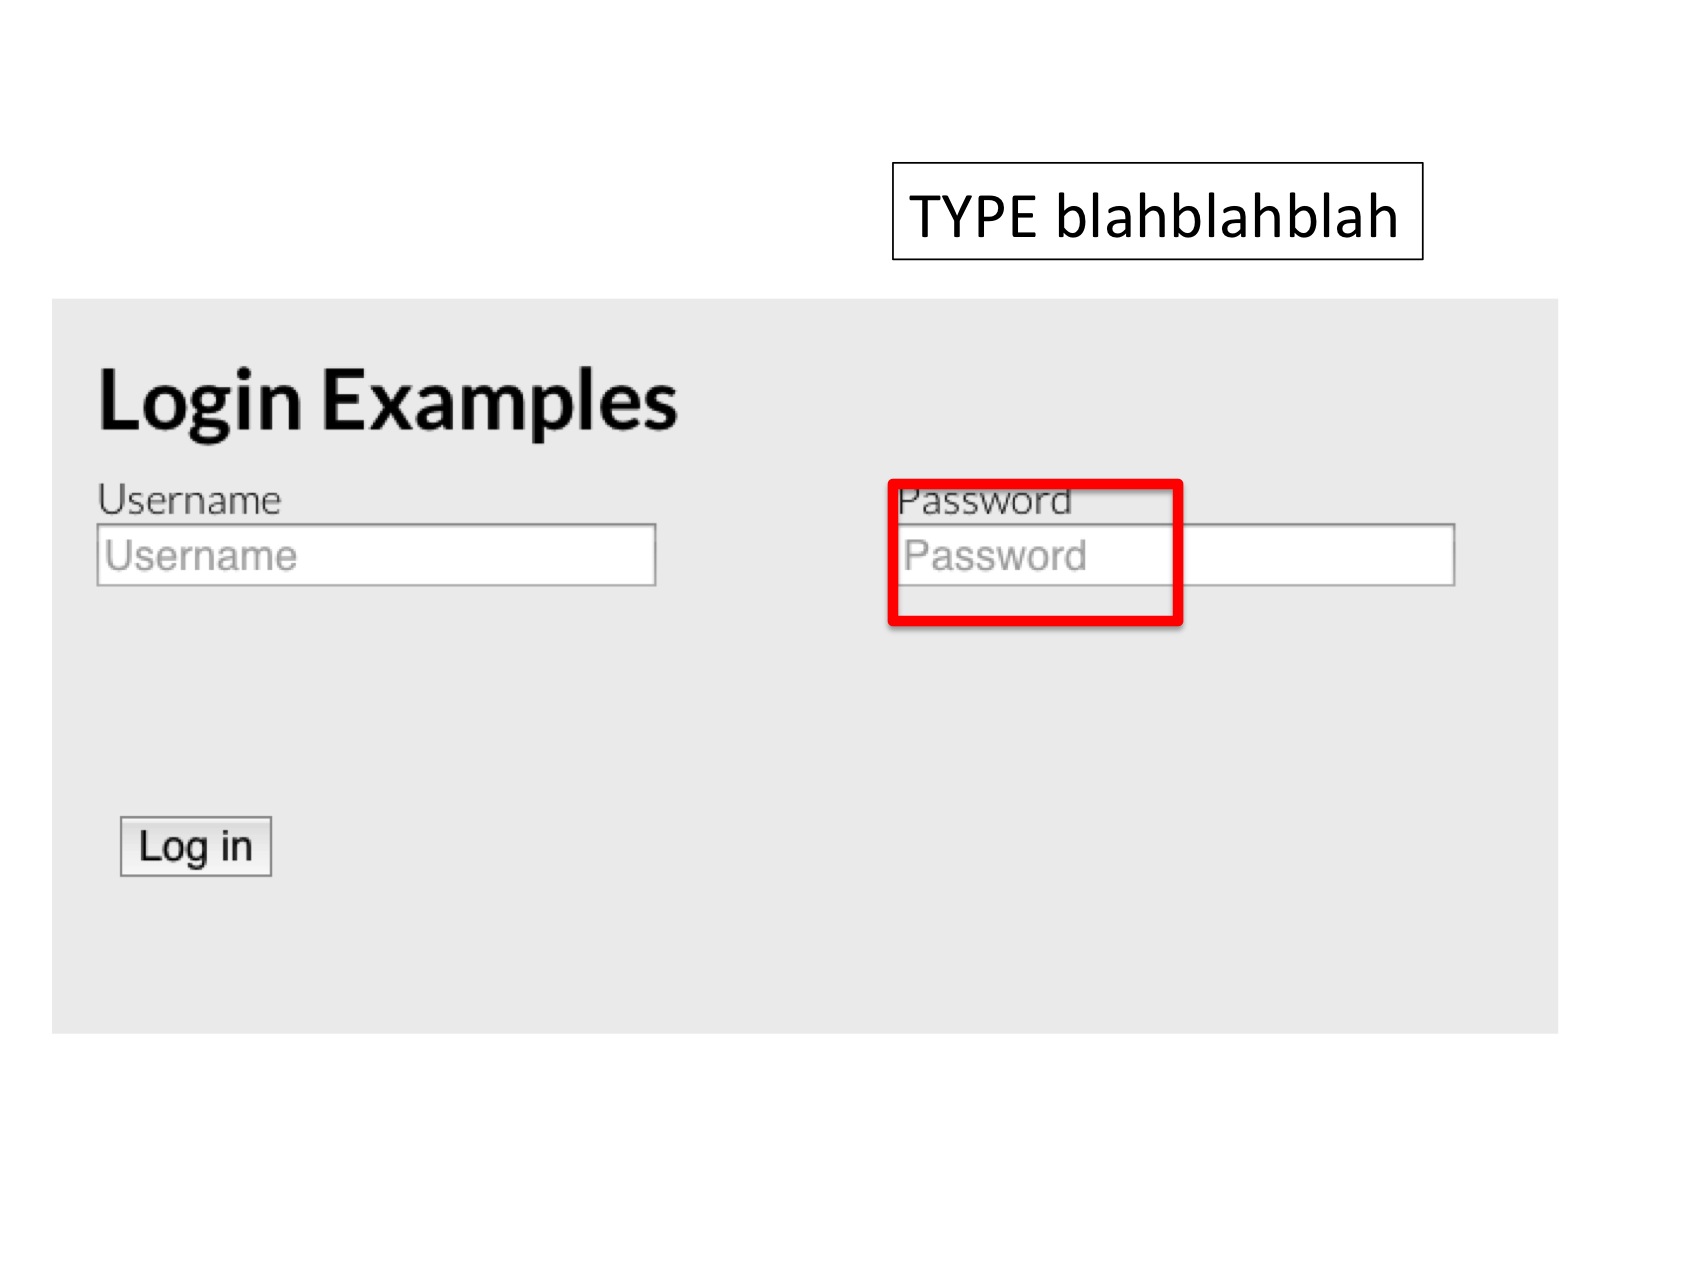
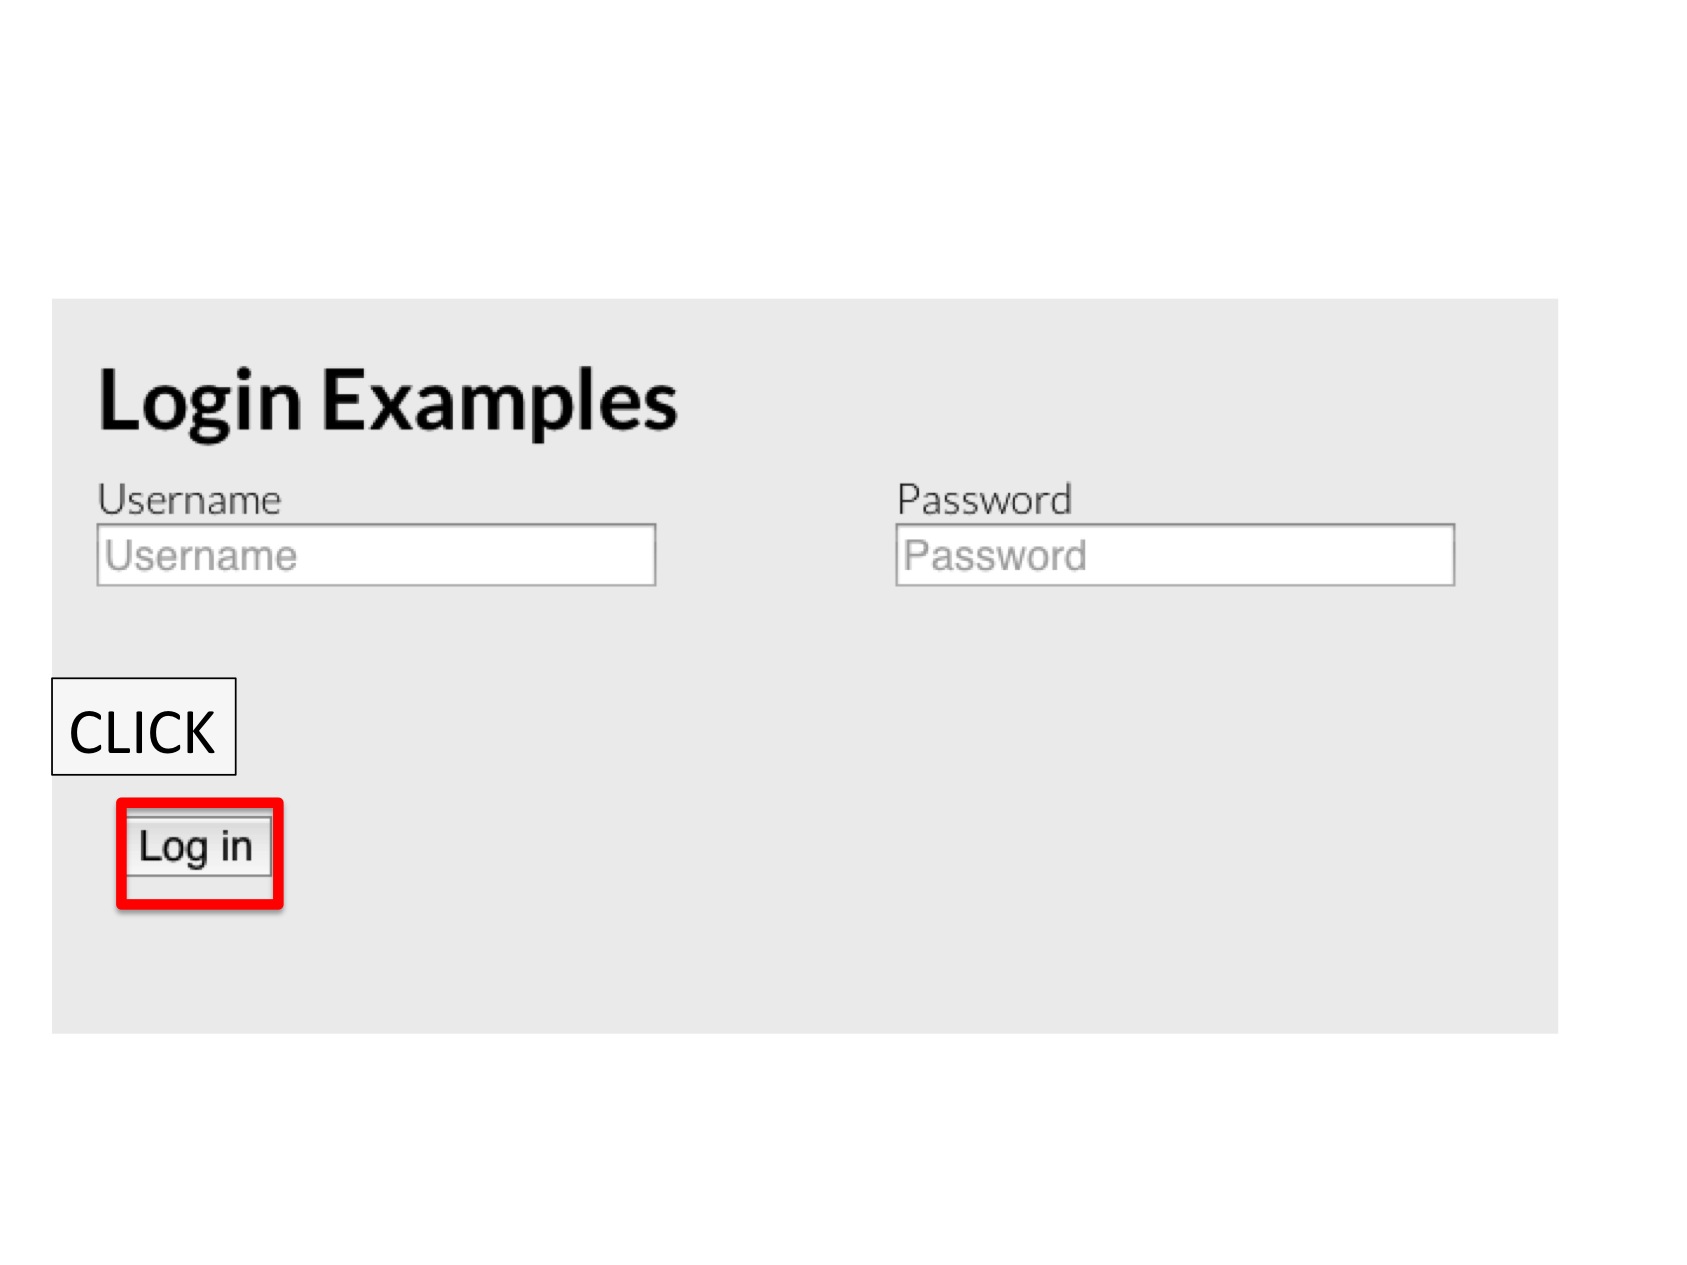
Let’s suppose the input file login.pptx has three slides:
Sikuli Java API
If no target is explicitly specified, the code generator produces Java code that uses the Sikuli Java API library to perform image-based automation. The generated source code will look like:
class MyLoginProcess {

	// TODO: modify these settings if the default settings don't work for you
	public static int DEFAULT_WAIT_TIME = 5000;
	public static float DEFAULT_MINSCORE = 0.7f;

	// TODO: modify this path if you moved image files to another location
	public static String DEFAULT_IMAGE_DIRECTORY =  "images";

	// This method executes all automatically generated steps
	public void executeAll(){

		boolean success1 = step1();
		boolean success2 = step2();
		boolean success3 = step3();

		// TODO: Add code to handle the return value of each step
	}

	static public void main(String... args){
		MyLoginProcess prog = new MyLoginProcess();
		prog.executeAll();
	}

	public File findImageByName(String name){
		return new File(DEFAULT_IMAGE_DIRECTORY + File.pathSeparator + name);
	}

	//================================================================
	// BEGIN: Automation Steps
	//================================================================


	// Source: Slide 1
	// Action: type
	// Argument: admin
	public boolean step1() {
	    	Target target = new ImageTarget(findImageByName("image1.png"));
	    	target.setMinScore(DEFAULT_MIN_SCORE);
	    	ScreenRegion loc = screenRegion.wait(target, DEFAULT_WAIT_TIME);
	    	if (loc != null){
	    		mouse.click(loc.getCenter());
	    		keyboard.type("admin");
	    		return true;
	    	}else{
	    		return false;
	    	}

	}


	// Source: Slide 2
	// Action: type
	// Argument: blahblahblah
	public boolean step2() {
	    	Target target = new ImageTarget(findImageByName("image2.png"));
	    	target.setMinScore(DEFAULT_MIN_SCORE);
	    	ScreenRegion loc = screenRegion.wait(target, DEFAULT_WAIT_TIME);
	    	if (loc != null){
	    		mouse.click(loc.getCenter());
	    		keyboard.type("blahblahblah");
	    		return true;
	    	}else{
	    		return false;
	    	}

	}


	// Source: Slide 3
	// Action: click
	// Argument:
	public boolean step3() {
	    	Target target = new ImageTarget(findImageByName("image3.png"));
	    	target.setMinScore(DEFAULT_MIN_SCORE);
	    	ScreenRegion loc = screenRegion.wait(target, DEFAULT_WAIT_TIME);
	    	if (loc != null){
	    		mouse.click(loc.getCenter());
	    		return true;
	    	}else{
	    		return false;
	    	}

	}


	//================================================================
	// END: Automation Steps
	//================================================================


}
Since there are three slides, the code generator produces three functions (step1, step2, step3) to perform the actions on these slides, one function per slide. At each step, one image target is involved. The image describing the target is cropped from the screenshot in the slide, indicated by a red rectangle. Below are the target images generated:
image1.png
image2.png
image3.png


By default, these images are saved in a directory called images created in the working directory. This can modified by the -image_dir command-line option, like
$ java -jar sikuli-slides-1.5.0.jar generate login.pptx -image_dir images/login